
This tutorial is based off of several videos I watched on quilt as you go with sashings and other videos I have watched to improve my quilting skills. This is my take on what I learned and chose to do for my small quilt. This quilt will have 9 blocks that are not pieced and will be going to my daughter's cat.

I am basing the size my squares and sashing with the Mod Melon's quilt pattern.
What you Need
I am assuming you have the regular equipment for quilting; machine, rulers, rotary cutter, and pressing equipment.
Your choice of thread is what you want to use. I use high quality thread - Aurifil cotton for piecing and Glide for quilting. I have used Gutterman for both and was happy with them.
Sewing machine needles are important also. I have successfully made quilts using universal needles in 80/12. I have pieced with universal 70/10, and microtex in both sizes. Quilting has been 80/12 in topstitching, universal, and microtex.
The only extra item I have bought for quilt as you go is batting joining tape. It has been the best purchase in my life. I haven't had great success in sewing batting together. I bought mine at one of the quilt shops but you can get it at Amazon. Mine is 2" wide and I have done 3 quilt as you go quilts and have quite a bit left.
The pattern calls for 4 yards of backing fabric. I would buy an extra half yard to be sure you have enough. Think the same with your batting. I would guess you will need 1.5 meters of 96" wide batting.
Step 1 - Prepare The Fabric
After choosing your fabrics, starch them. You can:
Spray starch until super saturated and hang to dry
Use liquid starch with a ratio of 1 part starch to 2 parts cold water. Soak until the fabric is completely wet, squeeze out some of the excess liquid and hang to dry.
Starching does two things:
Shrinks the fabric
Stabilizes it which is great for precise sewing especially when doing curves.
Your fabric may look a bit wonky but I manage to get things cut out straight.
Step 2 - Sew Your Blocks
Cut out the pieces for your blocks. Cut them all out and then sew them either chain piecing or block by block according to the pattern instructions. Press according to what the pattern tells.
Trim your blocks to the size of the called for. In this case, you want the watermelon blocks to be 7.5".
As I am doing this quilt for a cat, I will be cutting the printed fabric to 7.5" square. I am not piecing my blocks.

Step 3 - Preparing The Batting and Backing
I am using batting left over from another quilt and know I can buy more of it. It is what the long arm quilter chose and I do like it. It has no scrim.
Cut your batting 1" larger than your quilt block. For this quilt I will be cutting the batting 8 1/2" square. You will need one batting block for each quilt block.
Repeat with the backing fabric.
In my case I will have 9 backing fabric and 9 batting blocks. For the watermelon quilt you will have 42 batting and backing blocks; one for each of the blocks you pieced.

Step 4 - Quilting Your Blocks
This step is tricky. I like to quilt my blocks using a straight line quilting. You may want to do an overall pattern on each block or row or the whole quilt. I prefer doing mine block by block.
I am using a walking foot on my machine. I lengthen my stitch to 3.0. As I am using Glide thread, I need to make sure that I have secured my threads well. This thread is slippery and will unravel leaving you frustrated. For this square I started off doing 6 tiny stitches at the beginning and end of each row. On other quilts, I have pulled the threads to the top, knotted them and buried them into the batting. My last resort is to glue the threads in place after trimming them to keep the threads from unstitching.
Lay out your backing wrong side up and then the batting layer. Smooth to fit. On top of that, lay your block so you have about 1/2" of batting showing. Pin in place. You can use quilting safety pins or straight pins. I use straight pins. At this time, I only prep one block at a time. I have done up to 3 once I have done the first block.

If you are going to just quilt each block like I am doing, you need to decide where you want to start. If I had a block I had pieced, I would stitch in the ditch to hold it down and then do the rest of the design. In most cases it is usually around part of the block design. As I have a plain block, I began the quilting rows at the center and moving out towards the edge. I did one row down each part and then went back and added the other rows on each side.

I grab one of each layer, pin, and then mark where the first 3 rows of quilting will go. The remaining rows are a presser foot width away from the first row. I will do all of my blocks this way as I only quilt one or two blocks at a time.
After looking at the block, I decided to do the same quilting pattern horizontally.

Step 5 - The Sashings

You will need sashings for the front, the back and the batting. I was a bit confused at first but it is easy to do. You need to work methodically through each layer. I am cutting the short pieces first.
Front sashing is cut 2.5" wide. For the watermelon quilt they state you need 36 pieces of sashing that is 8.5" long.
For my quilt I will need 6 pieces 2.5" wide by 8" long.
You need to have back sashings that are 3" wide by 8.5" long. You will need 36 of them
For my quilt I will do 6 pieces 3" wide by 8" long.
Batting Sashing
Repeat for the batting cutting it 1.5" wide by 8.5" long.
Note - I cut my sashing fabrics to 7.5" as I was using up what I had. The batting strips are 9.5" long as it was a large scrap that I could cut out the 6 strips I needed. I will trim and fudge as I go. Normal for me.
Step 6 - Prepping Your Blocks
You need to trim your blocks so they measure 7.5" square. I find the center of the block and then measure 3.75" from it and cut. Don't worry if batting and batting show as they will be the edge of your block for accuracy.


I trimmed A1, A2 and A3 blocks for demo purposes. I will do the sashing on Column A then do Column B and finally Column C. That way I can keep things orderly in my brain.
Take your 2.5" sashing and pin it right sides together to the bottom of block A1. I pinned it at each end and the center.

Press only the front sashing so the seam allowance is towards the sashing.


Next pin the top of A2 block to the sashing.

Stitch with a 1/4" seam. Press the seam allowance towards the sashing.

Turn over and lay a batting strip in the sashing. It should fit between the seam allowances. If necessary trim a bit off so it fits. It does not go under the seam allowances as they have the batting included in them.

Press the back sashing down towards block A2.

You are now ready to turn under the raw edge and stitch it in place. I spent quite a bit of time on this step. I finally decided that I wanted the width of the back sashing to be 2 1/8" wide and the remaining piece turned under. Monica Poole said to turn under 5/8".


You will repeat the process adding the sashing to the bottom of A2 block.


I will finish this block like I did the previous one. You will repeat this process until you get all the blocks attached in Column A. You do not add a sashing to the top of the first and the bottom of the last blocks.


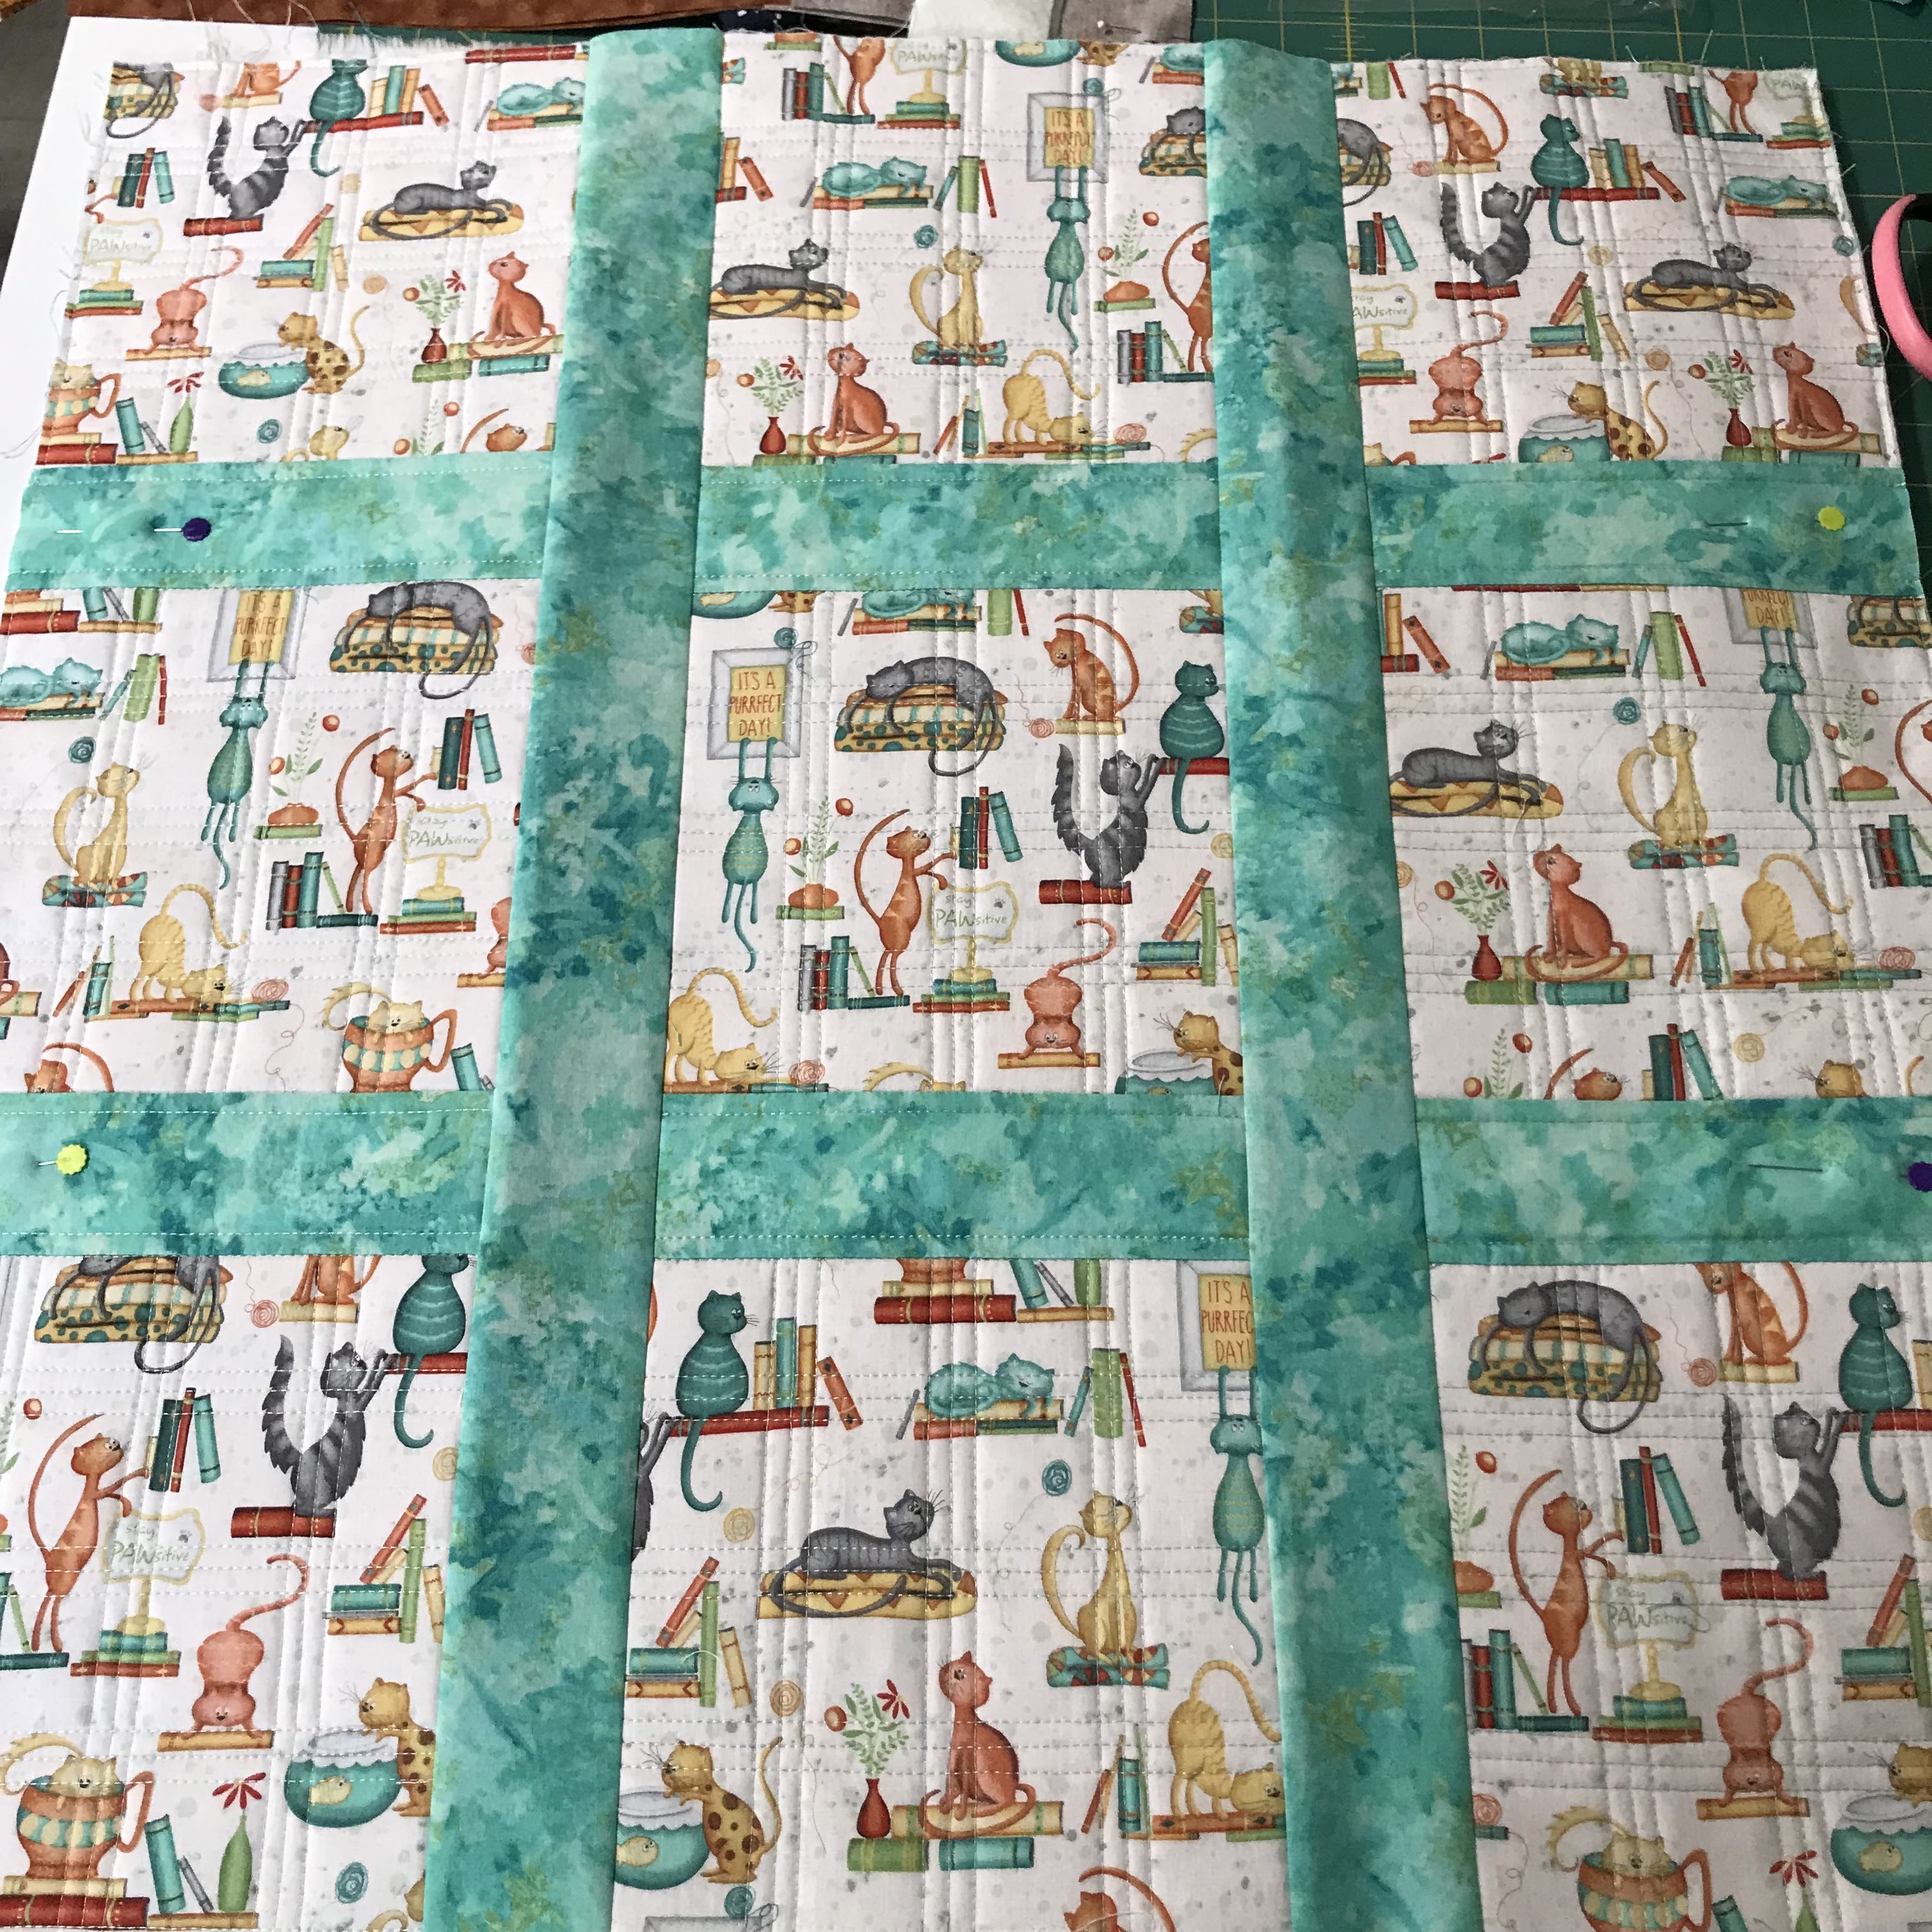
Step 7 - Vertical Sashing
I will be showing this with three vertical sashings as I was tired and not thinking straight. It won't be wasted except for the batting strip. The formula is to cut 1 less strip than the columns you have.
The top sashing is cut 2.5" wide, the back sashing is cut 3" wide and the batting is cut 1.5" wide.
I measured the length of the strips and cut the strips that length plus 1". You may have to join strips together to get your correct length and I advise you do it on the diagonal.


When I attached the second strip, I was careful to make sure the top of the columns lined up exactly. It worked for me as my blocks are perfectly matched going horizontal. Luck maybe.
I pressed the top sashing well and attached column 2. I then repeated the process to attach column 2 to column 3. You repeat until all columns are attached.
I turned the quilt over and pressed the back sashing so they covered the top sashing.


The backing strip was folded over to be on top of the batting strip. I measure that strip to be 2 1/8" wide and folded the remaining piece under and pinned it in place. To mark the fold line, I used a marking pencil and measured to make sure everything was straight.


Step 8 - Outer Sashing
The outer sashing pieces are cut 2.5" wide (front, back, and batting). Piece together the front and back pieces as necessary to get the length you need plus an inch. I do my seams on the diagonal and press the seam allowances open.
Pin the sashing front and back pieces to the sides as you did for the other sashes.


Trim the excess from the sashing pieces at the top and bottom of the quilt.

Batting Tip
I had two pieces of batting that were too small for the outer sashing. I fused them together with fusible batting tape. This is a Canadian supplier and you can get a similar brand on Amazon.

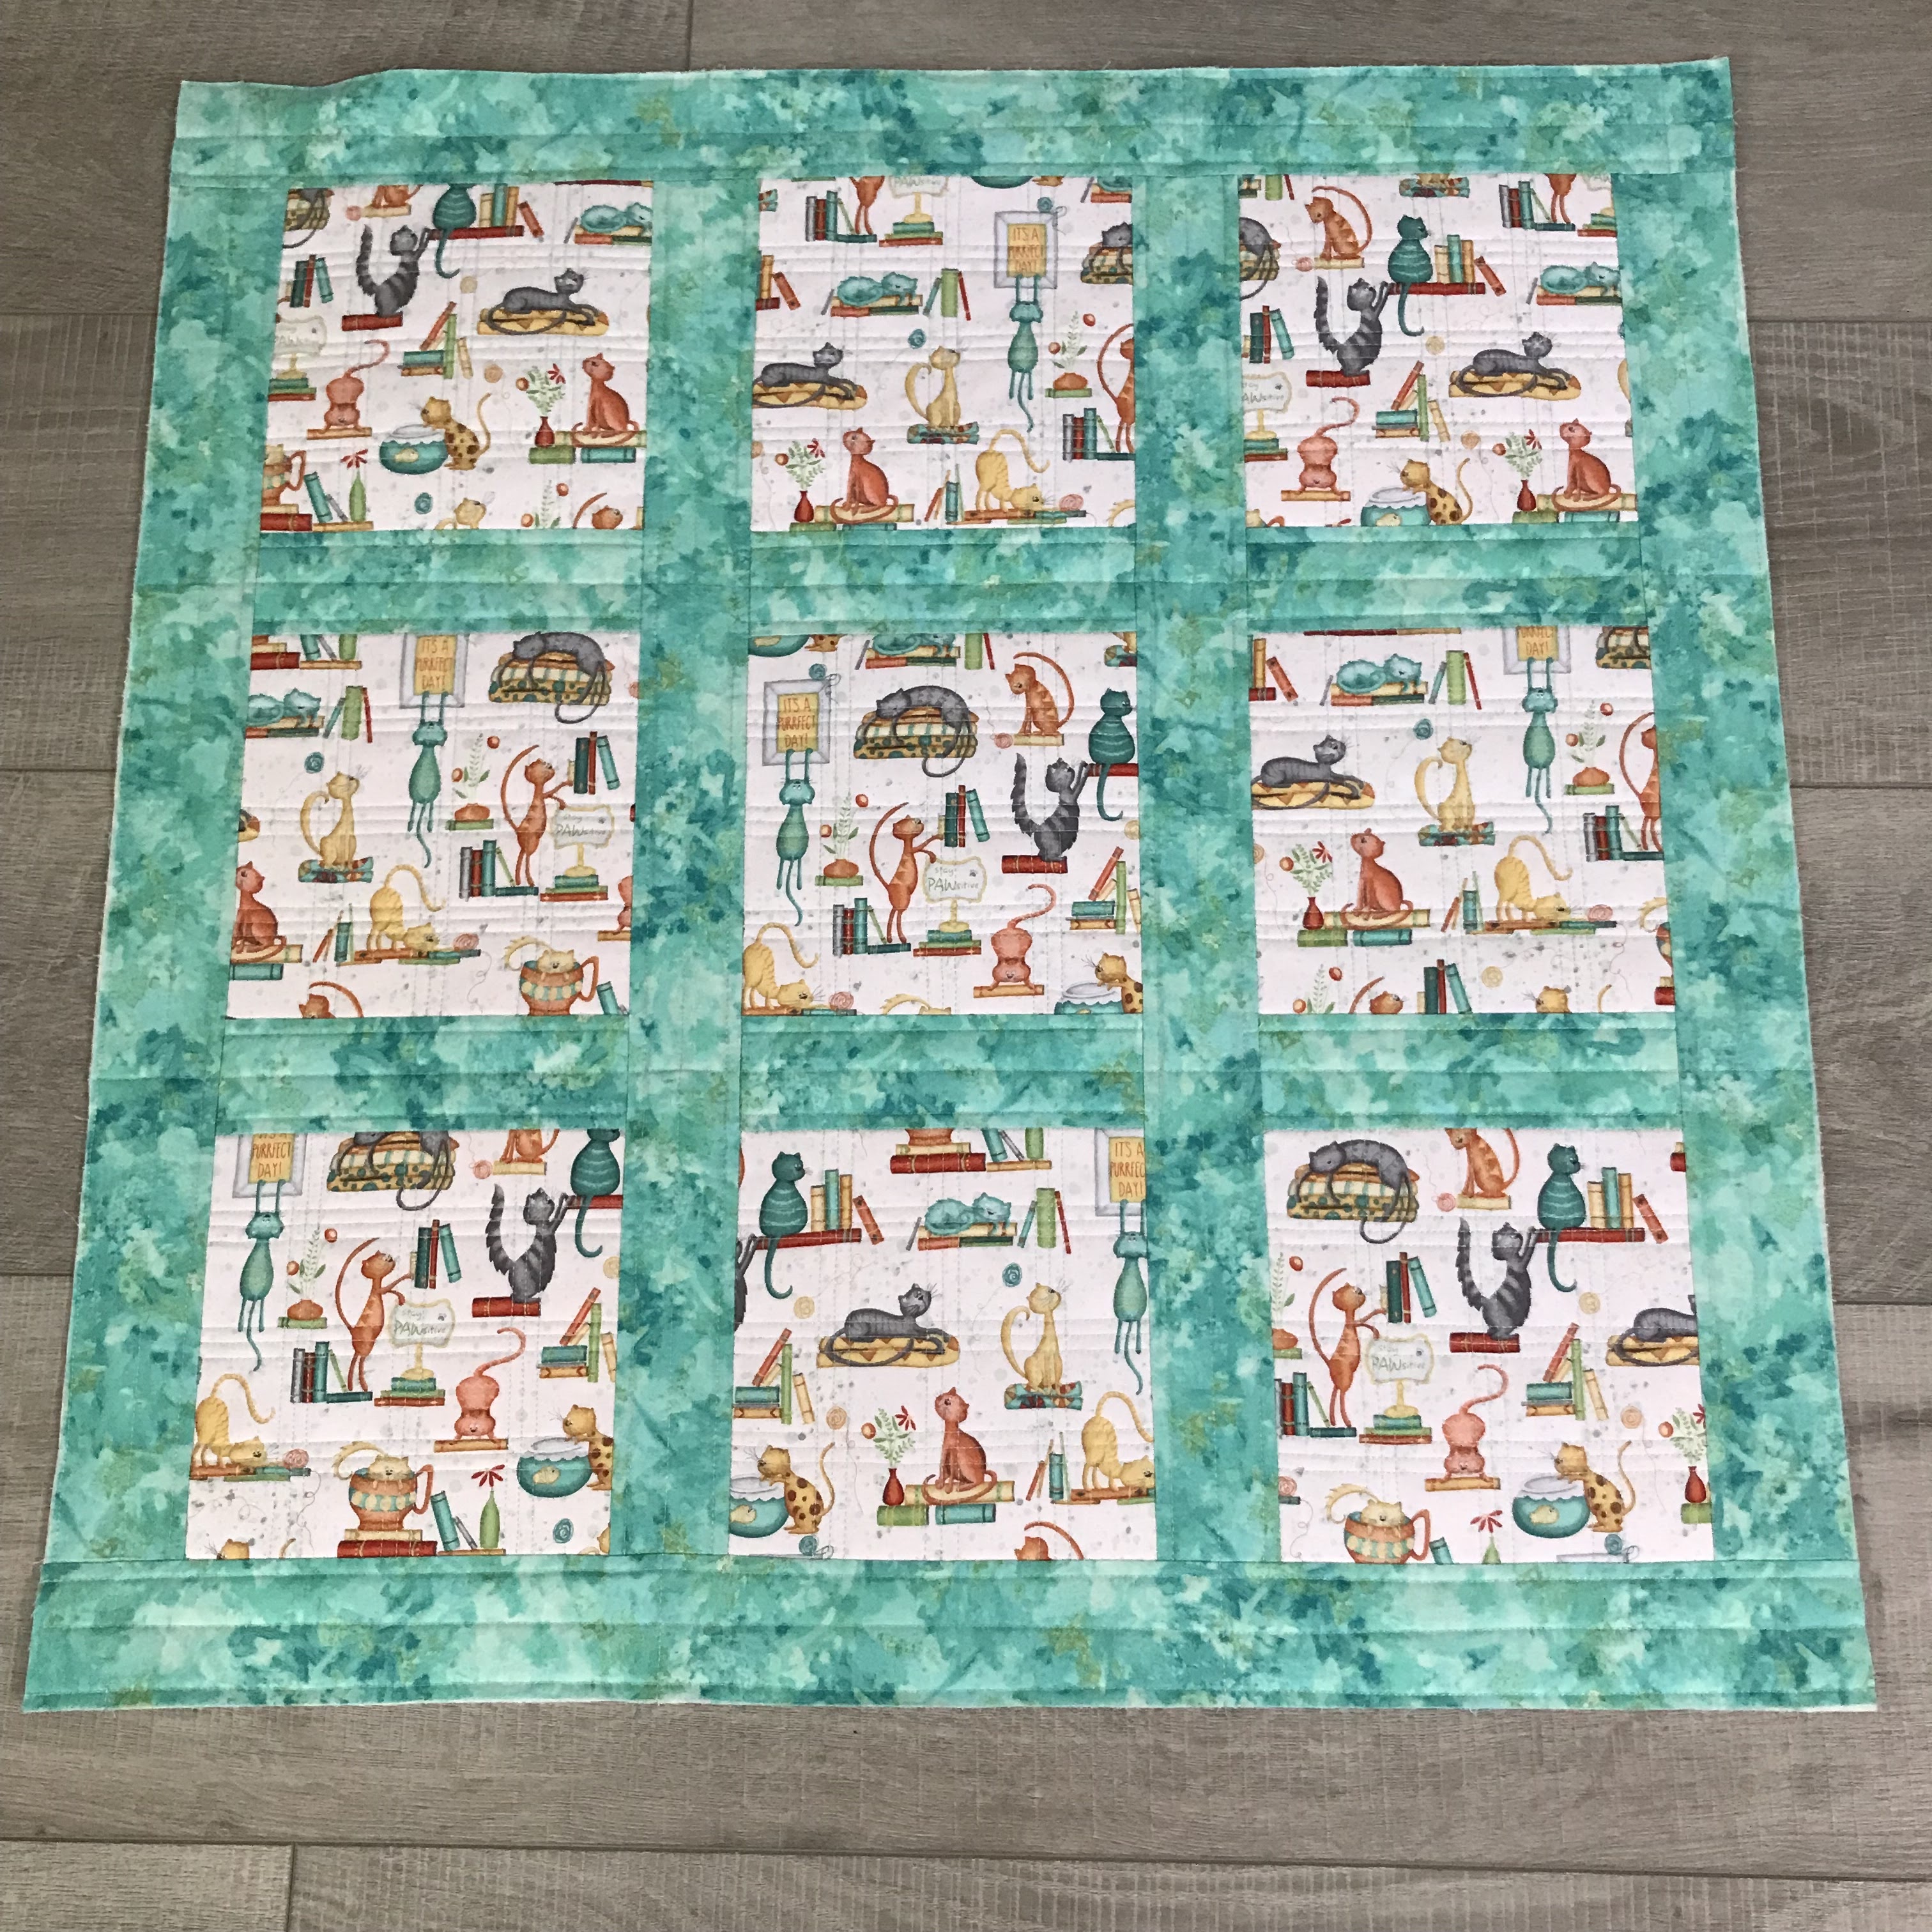
Step 9 - Finishing Your Quilt
I decided to stitch a row of quilting down the center of each piece of the sashing. I started with the horizontal rows and stitched from side to side. I repeated with the vertical rows. To make sure I was in the center of the sashing I drew a line 1" in from the seam allowance using a frixon pen.

Step 10 - Binding
I cut my binding 2.25" wide and for this quilt I needed 4 strips. I sew my strips together on the diagonal.

When the binding is on your quilt, it is ready to hand sew in place. I mitre the corners and enjoy videos as I do the hand sewing.

Thank-you for this. Very clear, a terrific supplement to online videos.
ReplyDelete