Monday, August 06, 2012

Core Four Ideas

I keep looking at my fabric for a wardrobe for myself based on the idea of 33 items of clothing in a wardrobe. Here is what I keep thinking about with what I have in my stash.

Core Four Fabric  
Black denim jeans Have Sew
Black denim jacket Have Sew
Black short sleeved t-shirt Have Sew
Black 3/ length sleeved t-shit Have Sew
     
Expansion Four    
Magenta Twill capris Have Sew
Magenta Twill walking shorts Have Sew
Pink short sleeved t-shirt Buy Sew
Pink cotton short sleeved shirt Buy Sew
     
Mileage Four    
Pink and white striped cotton shirt Have Sew
White sweater Buy Knit
Turquoise 3/4 length sleeve t-shirt Have Sew
Print top with magenta and black in it Buy Sew
     
Integration Four    
Black bag with magenta trim or reverse Have Sew/Quilt
Pink sandals Have  
Black shoes Buy  
Yellow Pin Buy  

Until tomorrow…………………….

Wednesday, July 11, 2012

Hotter than...........

Just a reminder of how hot it was last summer. Hotter than..................

hot outside

There was 6 weeks of hot weather (95 to 101F). Longer than most could tolerate.

Friday, June 01, 2012

Pattern Storage Idea

I found these wonderful Expanding File Jackets at Staples.

filing jacket

I got the idea from Marie Louise at How Do You Sort Your Patterns on Stitcher’s Guild. Marie Louise states she puts the pattern pieces, instruction sheets, and traced pattern, notes and pictures into the jacket. She splits the pattern envelope into two pieces and puts the front onto the front and the back onto the back of the jacket. She shows them stored in magazine holders. Wonderful idea and worthy of copying.

Monday, April 30, 2012

Pillowcases

The embroidery on the red bag was free from some unknown source. I have had it for many years. If you go to Sky Drive you will find it there.

I have done a bit of endless embroidery but not a lot. I want to try more of it as I do have several designs; one being morning glories. I did it on a tea cosy the first year I did Embroidery Club. I thought a bit on what to do endless embroidery on and it hit me. Pillow cases!! I am going to learn how to do them using this tutorial.

I won’t be embroidering on the first two pillowcases as I am using up fabric I bought last year for the guest room. The stripe is the main fabric and I can choose out of these two colour ways to match the quilt in the room.

001
002

Making a pair of pillow cases will allow me to figure out the embroidery placement.


Thursday, April 19, 2012

Fancy Yokes Tutorial

Fancy yokes are not hard to do if you follow the following steps that I adapted from a Ron Collin's class. Use fine net to sew to the curved edges to finish them prior to sewing the yokes on the shirt. The net isn’t bulky which is perfect.
First step is lay the net onto the yoke piece. I make sure that it is even with the front edge and it goes up high enough to be in the armhole. On this this shirt, I stiched 3/8” from the edge and clipped the curves. Trim to 1/4".

007

Next turn the netting to the wrong side of the fabric and work it to the back at the sewn edges. Watch to make sure all corners are sharp. For these shirts I am adding black piping. I have pinned it on to the sewn edge of the yoke.

008

The wrong side of the yoke.

009

And then I baste the piping in place so it won’t slip when I sew the yoke on to the shirt.

010

I sewed the yokes together at the shoulder seam and, after pressing, I pinned them in place on the shirt body. I stitch down the neckline and fronts 3/8” so they won’t slip. I then pin the yokes down and stitch them in place.

012

Until tomorrow...................................

Tuesday, April 17, 2012

1600 Inch Quilt

I was sent information on the Jelly Roll Quilt Race.  I plan on doing it after I finish all my rodeo sewing. It should be fun and I will take my time and enjoy the process.


I have all these bali pops which would make 5 quilts but I wouldn’t do that.

004

Until tomorrow....................

Monday, February 06, 2012

Pointed Yokes

Someone from Stitcher’s Guild asked if it was hard to make pointed yokes on a western shirt. The answer is no. They are actually the easiest of all the yoke designs I put on my shirts. So here we go.
For my husband’s shirts, I use Simplicity 5366 and I use only the back yoke. The front yoke is one I copied from a ready made shirt he owns. The front yokes on this shirt are too deep and can actually be used as a flap for the pocket.
5366
To begin with, go to Pointed Yokes and down load both the front and back pointed yokes which are in pdf format. These are going to be you jumping off point to making yokes to fit your shirt pattern. You will notice the arm hole and the shoulder seam on the back yoke are not completely there. Don’t worry, you will fix that when you do your tracings.
For lady's shirts we have used this pattern.
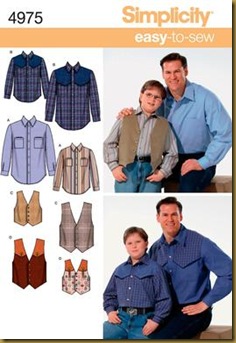
4975
The husky boys shirt is a basic pattern and we added length to the body and sleeves for our first go round. The size I am showing you is in a medium but you can over lay the yoke onto other sizes to change the size of yoke.
When I made the front yoke patterns, they fit a large man’s shirt and I had to skinny them down. I laid the body pattern pieces onto my yoke pattern lining up the front and center back as such. I took care to make sure I liked where the point was on the front, I moved things around making sure everythings was on the straight of the grain.
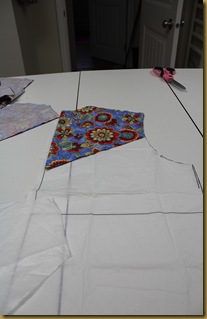
003                         004
I then (on an old pattern) traced the yoke right onto the body pattern pieces. That gave me my outline for the yoke. I then traced the yoke onto another piece of tissue paper using the neck, shoulders,front and back armholes and fold/center front of the pattern plus what I had traced onto the shirt. It was quite easy to do.
Onto the sewing:
Cut out all  your pattern pieces and put all aside but the front and back body and yoke pieces.
004
If you are adding darts to the body, do them first. Then sew the body of the shirts together at the shoulders wrong sides together and press the seams open. Set aside.
002
As I have an issue with getting 5/8” correctly folded under, I stitch it on the yoke fronts prior to sewing the yokes together. Only stitch the pointed parts using a long stitch.
006
Stitch the shoulder seams of the yokes right sides together and press the seams open.
005
Fold under the yoke points and press well. Remove basting stitches.
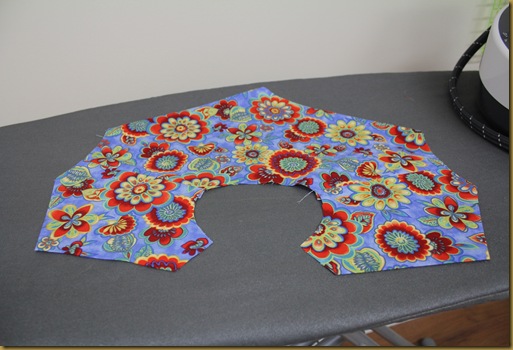
007
Turn over and put Steam-A-Seam or Heat-N-Bond (1/4” width) onto the seam near the folded part. Steam into position. I am using regular Steam-A-Seam but Ron Collins recommends light.
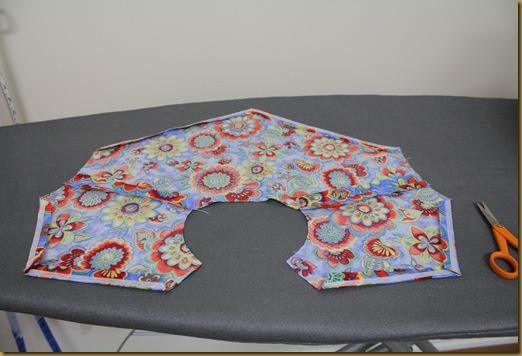
008
Pin the yoke onto the shirt. Line up the shoulder seams at both the neck and arm hole and pin into place. Then line up the fronts and pin into place. Smooth out the neckline area and pin into place. Finally do the pointed part and pin into place.
009
Remove the paper from the fusible webbing and steam it into place. No shifting of the yokes when you move it around to sew.
When you look at the inside of the shirt, there are no raw edges showing at the shoulder seams.
010
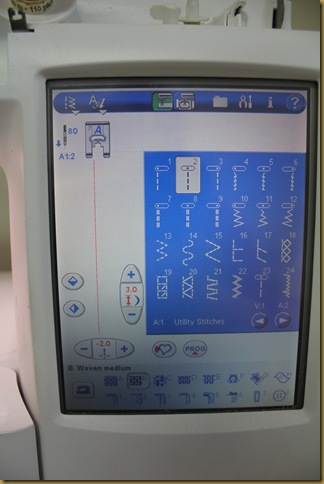
I use two different presser feet to top stitch. The first foot I use is the Left Edge Foot. I use a longer stitch and set the needle so it is –2.0 or very close to the edge of the yoke.
011
012
The second foot I use is the Edge foot. I set the needle to be 1/4” from the edge of the yoke and the stitch length is the same as the previous row of stitching.
014
013
You can do this without these feet using your regular sewing foot. I did it on one shirt and didn’t die doing it.
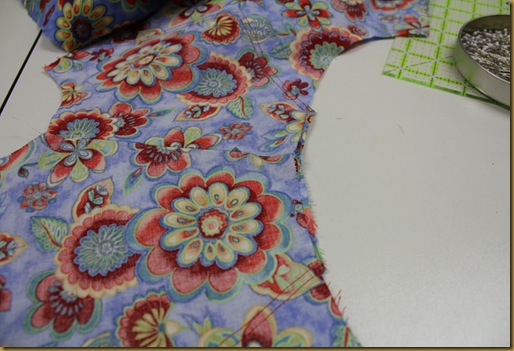
Give the yokes a good press and check the underside to see if the yokes fits at the neckline and the arm holes. If not, trim off the excess.
019
020
I always stay stitch the neckline 3/8” from the edge to keep the yoke and shirt bodies from shifting. Give a final press and you are ready to sew on the front button band.
021