Friday, April 25, 2014

Drawing A Bodice (Again)

Yesterday was nice but cool until the afternoon. It then warmed up. Today is cloudy and we could see showers.  

008

I did my PlayWork yesterday morning and my knee ached until after I got home. Then it quit hurting. I hate that. Next run is the Boogie tomorrow morning. Looking forward to all the energy that will be flowing.

I spent the morning working on the bodice of the little girl’s dress. I had all the measurements in hand and started working.

014

Child’s Measurements
 
Back  11.5” Shoulder to Chest  6.25”
Chest  24” Shoulder to Waist  12.5”
Waist  22” Shoulder to hem  33”

I cut the first bodice and it was too short so I cut one longer and trimmed it back to the correct length of 13.5”. The width of the fabric was 36”. I turned under the center back an inch and pressed in place. The center backs were folded in to the center front and the whole thing was pressed well and was 8.5” wide. That is wider than what Chinelo asks you to do but I am still learning and like extra fabric.
010

I was ready to go on to the second side of my worksheet. You can see I made a few corrections in blue.

016

Following Chinelo’s directions, I started to measure from the center fold. I am drawing on the wrong side of the fabric.

Here is how it went:

Measure from the center front/back 1/2 of the back measurement at the top of the fabric (5.75”)

At that dot, measure down the distance from shoulder to chest plus 1/2” (6.75”)

At that mark, measure from the folded edge 1/4 of the chest measurement plus 1” (7”)

At the bottom of the fabric measure 1/4 of the waist measurement plus 1.5” (7”)

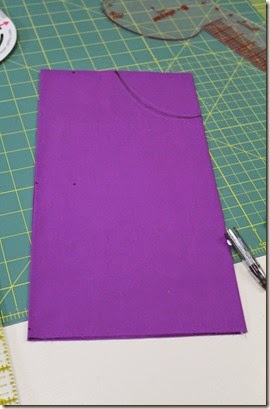
At the neck, measure across 3” and down 3.5”. I used my Sure-Fit ruler to draw the neckline. It was perfect.

To draw the armhole, I used this ruler and fiddled around until I got what I wanted.

021

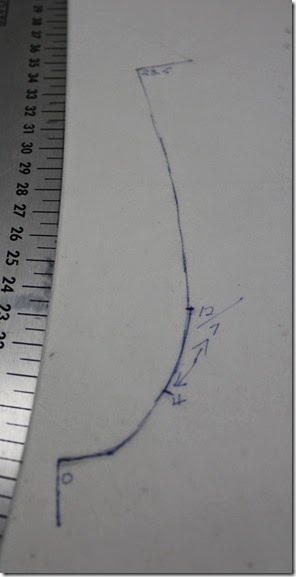
I trace what I need on to my pattern tracing pellon. At the under arm edge, I drew a bit of a straight line (3/4”) and then started to draw what I wanted as I wasn’t pleased with the scoop that the ruler drew on the fabric so I worked at fixing it. I do put down numbers on the ruler for future reference. The drawing becomes invaluable.
023

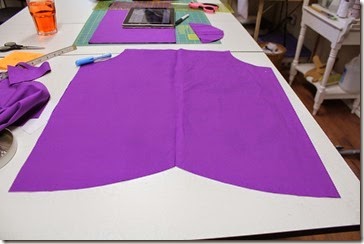
At the top of the armhole, measure down 1/2” and join that dot to the neckline for the shoulder seam. Ready to cut out.

011

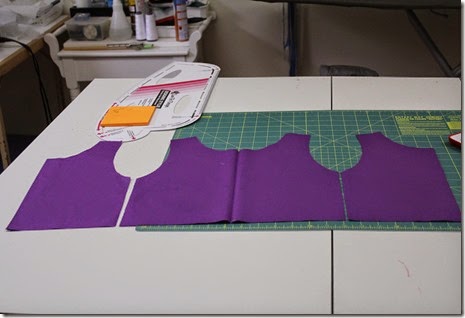
And cut out ready to draw the darts.

012

The darts are fairly easy to do following Chinelo's directions. From the center front, measure 3.5” and draw a line 4” long vertically. Fold on this line and draw a dot 1/2” from the fold at the bottom of the bodice. Draw a line from that dot to the top of the fold line. Stitch. Do one on each side of the center front of the front bodice and one one each back half using the center back to measure. The backs darts are just over 4.5” long.

013

I measured the waist and the chest at the under arms and the measurements are looking good. I will be using 3/8” seam allowances. If this works perfectly, I will add 1/4” to each of the chest and waist measurements so I can make 5/8” seam allowances.

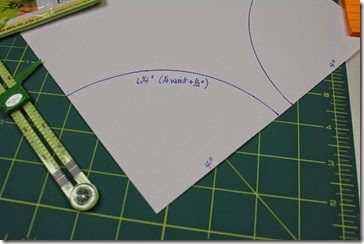
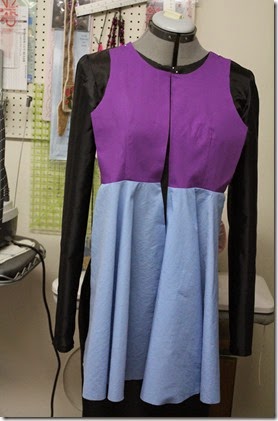
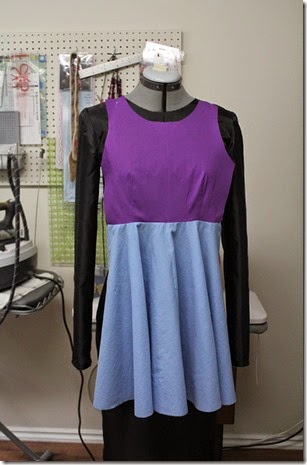
I am ready to start the skirt. I did the template after I measured the waist on the bodice.

019

The distance down from the point is 3 7/8” and I used the handy tool I showed to draw my line. The curved edge is 6” for a 24” waist line. Perfect!! I will show the skirt as I do the drawing for it.

This morning we have Kid’s Gardening. I have to get a few more pots and a couple of plants as we have 12 children and their parents coming. In the afternoon, I have to get ready for Boogie tomorrow and I may get some sewing done. If I do sew, it will be the skirt on this dress.

Until tomorrow…………………….
Wednesday, April 23, 2014

Little Girl’s Dress Muslin

Yesterday started out sunny and then the storm clouds came in making it cool. All storms split and missed us. By the end of the day, it was lovely once again. This morning is cloudy and it looks like it could be a damp day.

My turn to get the blood pressure machine for 24 hours was once again cancelled yesterday. The technician still can’t get into the program. I go now on May 5. Maybe that is a good thing as I really need to sleep well for the next few nights.

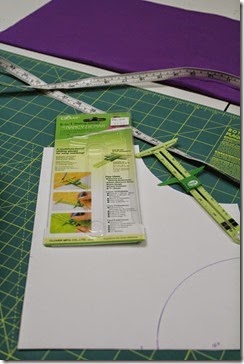
My morning in the sewing room was less than stellar though I started out strong. I realized that I could make the quarter circle to cut out the waist of the skirt using this neat tool.

001 

After a bit of fiddling, I got what I wanted and started to draw and write down numbers.

005 006

008

I had a couple of oops when making the skirt. Lack of brain power and the ability to understand what Chinelo Bally had written. The back of the skirt turned out like this when I read and did what I thought she had written. Lesson learned; think while reading. And visualize what she wrote.

009

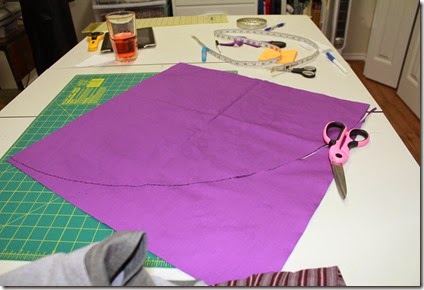
I then did the front skirt.

010

When I attached it to the front bodice, the skirt was too big in the waist.

012

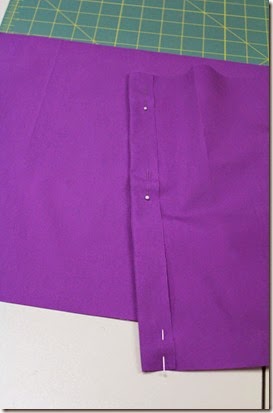
Back to the drawing table and I made the waist template smaller; the size of the bodice at the waist. Back to the cutting table and I started all over again. This time, I made sure the back pieces were separate with the 1” turned under at the center back seam before I started drawing. The pins at the one side indicate this is the center back of the dress.

013

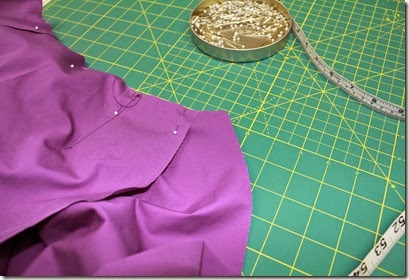
 I sewed them on to the back bodice pieces wiggling and fitting them together. I think I will make the darts a bit narrower the next time; 3/8” rather than 1/2”. I can always make the darts deeper if the bodice is too big.

019

The back is ready for a zipper. Then I moved onto the front skirt. One mistake of not making the skirt width wide enough and then I got it right. Think while you read is the name of the game. Again, I will make narrower darts on the front bodice.

024

Thank goodness this is a muslin. And my exploring time. So far it has been a lot of fun and I have learned lots. Enough that I will make this dress up in nice garment fabric. I will document the process with numbers to get the size that fits this little girl.

The final steps for the mystery quilt are out and it is a simple layout. I will fiddle with how I want it to look on our bed when I have a couple of hours. Once that step is done, it won’t take long to sew up.

Today I am off to the city to shop and for an appointment. I have a lot of stops today so must be organized to the nth degree.

Until tomorrow………………………..

Tuesday, April 22, 2014

Pen to Fabric and More Borders

Yesterday started out cool with the temperature at 4C. It did get to 19C before the clouds rolled in and cooled it off. By bedtime it had started to rain and we must have had several showers during the night. All is wet outside.

I started out the day with PlayWork. As I didn’t have the information, I walked 3 minutes and ran 4 minutes for 7 intervals plus walked another 15 minutes after that. That wasn’t what I was to do but it was okay as I won’t be out again until Friday. That day I will do a total of 30 minutes.

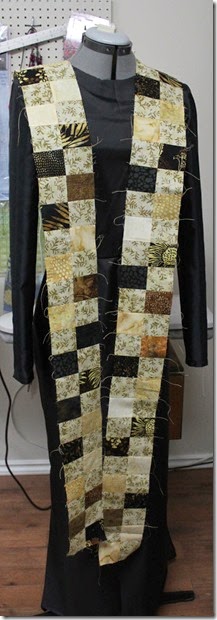
After the workout, I worked put the zipper into the top as promised. I had to add a piece to the bottom to lengthen it before I could start. All went well and it was out of the house before noon. Once that was done, I finished the second border (as everyone calls them). Two rows of 29 pieces in a checker board design.

002

They do look nice on the black lining. I am enjoying this simpler mystery quilt though I am rushed for time with so much going on this week. But, it has me craving to do another quilt later on.

Before I ended the day, I sewed the darts in the bodice of the girl’s dress and pressed them.

005

I am ready to draw and cut out the skirt. I have read the instructions on Chinelo's blog quite a few times and think I have it in my mind enough that when I put the pen to the fabric, I will be able to transfer numbers to marks and lines.

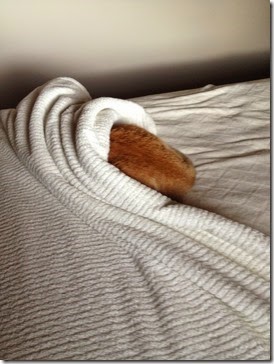
We have a lot of fun with Elliott, our cat. His new place to sleep is our bed as he loves our plush blanket. He also loves to snuggle under the light weight blanket at the foot of the bed.

001

002

003

Today, my plan is to start the two longer “borders” on the mystery quilt. I would like to work on the skirt of the dress if I have time. I have to be at the hospital this morning to have a blood pressure machine put on and then a photo session just before lunch.

Until tomorrow……………………

Monday, April 21, 2014

Drawing a Bodice on Fabric

We started out warm and saw the sunshine and then………….it got cloudy and it cooled off. It did get to the forecasted temperature though. Easter is like this even when it is late. This morning is cool at 2.9C.

A big part of yesterday morning was spent cleaning the house. The head fell off the steam mop again causing me to get upset. The Spousal Unit put it back on with a larger screw but I will have to get a new one. This one’s days are limited. While waiting for floors to dry, I did sew on the strips for the mystery quilt and got the first one done.

072

 After lunch, I started on the dress that Chinelo Bally blogged about. With all the measurements and the instructions on the iPad, I got started. The bodice length was cut (13” in this case). From the folded edge, I measured 15” and cut it off (30” was needed according to the instructions; chest measurement plus 6”)

054

 One inch was turned under on each end (center back edges) and pressed.

058

Those center back edges were then folded to the center front fold and pressed until the piece measured 7” x 13”.

060

With the folded edge facing to the right, I followed the instructions of measuring:

  • measuring 1/2 the back measurement from the center fold
  • measuring down from the above dot the shoulder to chest measurement plus 1/2” (6.75”)
  • measure the 1/4 of the chest measurement plus 1” (7”)
  • from center front measure 3.5” over and 3” down.

This is what it looked like after I drew in the neckline.

062

And then I acquired a mess trying to figure out the armhole. Out came the kids package from Sure-Fit Designs to help me along.

064

I did a mock up on a piece of tracing paper to get the idea and some numbers on a ruler you can’t see for the mess. I put the numbers on the mock up for future reference. The arm hole was drawn in and a thin line drawn down from under the arm to the waist. All the black lines were cut out and we had a bodice.

066

Following the directions, the bodice was folded 3.5” from the center front. The front darts are 3.5” long. The same was done for the back but the darts are 4.5” long.

068

Ready to sew the darts. It was exciting to see how you can make a bodice using the information Chinelo gave. Next is the skirt.

I cleaned up the cutting table and laid out part of the next squares so they can be sewn together today.

073

At this point I had to stop and start supper. It was a fun day in the sewing room. I am learning and exploring and enjoying myself.

Today I have to install a zipper and then sew the squares for the mystery quilt. I need to have it done for Thursday for the last clue. I also hope to go out and run this morning. I have to do two this week and then it is the big day next Sunday.

Until tomorrow…………………….

Sunday, April 13, 2014

First Quarter Review

(This is one of the posts I lost and it suddenly appeared again. I wrote it on March 31, 2014)

It is hard to believe that over 25% of the year is completed. I decided that I would look at my progress four times this year to keep on track. My goal this year was to Explore and I have done that.

Life Style

I have changed my life style a lot. First it was changing what I ate and loosing weight. I attended the diabetic clinic, got a glucometer and was on the road to feeling healthier. I have lost 33 pounds and have my glucose readings in the normal range though it does go down into the lower range. My blood pressure is under control through medication and exercise, thyroid medication was changed for the better, and the pressure was lowered on the CPAP machine.

Exercising was an indoor thing due to colder than normal weather. I know our winter was mild compared to other places, but we experienced higher humidity than normal and the temperatures cooler driving most people inside. I used Wii Fit  Plus and was exercising 35 minutes per day. On March 1, I decided to go to a run club meeting and from there I have been outside three times a week walking, running, and having a good time.

running in the snow

We finished up decluttering on March 28 and was happy to see the last of it go. Once the basement is finished and cleaned, we will do the next level of decluttering. It won’t be a lot, but there will be some more to go out of the house.

Sewing

I have done less sewing this quarter than ever. I am okay with that as I have been doing other things and living a more balanced life. Though hard at first, it has become easier to walk out of the sewing room to do other things. It has made me more appreciative of the time I am in the sewing room.

I have a shirt pattern for me that I like from Sure Fit Designs. It took three tries to get what I wanted.

003

I am ready to make myself a vest from an OOP pattern.

I did buy some fabric at great sales to make muslins. This has worked out well as most of my fabric is too expensive to make into muslins that may or may not fit. I have been to the fabric store a lot less and only for items on my list.

One rodeo queen dress muslin was sewn for a fitting. The dress is cut out, partly sewn and ready for the bling. The lining is partly done. This is the first of 3 dresses I am making and that is all I plan on doing. It is less stressful this way.

Crafts

I made 5 artfolios that were purchased for an exchange by a group of moms in our community. They were fun to make. I also made 2 kidlets for 2 boys I tutor. A mystery quilt came out and I joined it. It is done over quite a few weeks with clues coming out once a week.

001

002

I haven’t done any embroidery as I only have one machine, the embroidery machine which I am sewing on. I have to take the other machine to be repaired. Once I have two machines, I plan on doing more embroidery. I did play with the courses I bought but not a lot of it was new. I have a book to go through and as you make designs, you stitch them out. I also have other projects to stitch out and make up. But, I like having two machines when I embroider. I usually sew when the embroidery machine is stitching out.

Knitting and Crocheting

The Dude’s sweater was a disaster so I ripped it out and started it again. The back and the left front are done again. The right front was started.

Yarn for projects was purchased as I wanted to try out new patterns. I crocheted some hats and cowls plus knit three cowls from new patterns and the yarn I bought. Fun items for the craft tub.

005  008

Next Quarter

Run 5k (well walk run 5k) in a marathon and start the next session of run club. I plan on remaining in the beginners group and won’t be running 5k in a marathon in July.

Eat well and loose 10 pounds. That means no extra sugary foods which means good glucose readings.

Make the vest for myself. Though I have made this vest about 10 years ago, I want to make it again for myself. I have a couple of things to work through with the zipper (interface the garment fabric at the zipper for stability and a bit of extra weight) and sewing up the side seams which includes the lining.

Sew a western shirt for a friend.

Start the second rodeo queen gown and have it ready for bling. 

Complete the mystery quilt and start a Halloween quilt using the disappearing nine patch design. This doesn’t have to be done until mid October.

Finish the Dude’s sweater and start a scarf for myself. The scarf is to go with the vest.

Be outside every day enjoying life.

Until the end of June……………………………………

Tuesday, February 25, 2014

Fitting the Upper and Lower Body Links

I had some issues with a neckline and set about to find out why. During my search I found Fitting the Upper Body. I downloaded and printed this file. A wealth of information. There is Fitting the Lower Body also which is included in the chart on the upper body.
Today I am off to the city. I hope to get home at a decent hour so I can trace the new bodice pieces. If no tracing happens, it will get done tomorrow morning.
Until tomorrow……………………….
Sunday, February 23, 2014

Banner/Sash Tutorial Part 3

Please read the three posts prior to doing this. I have made one change in red.

Part One

Part Two

This part is sewing up the sash/banner. Not too much of a mystery until I got to the end.

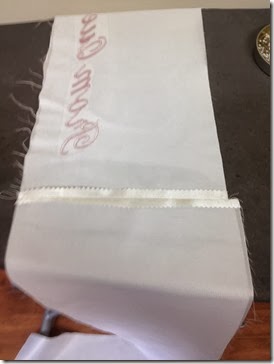
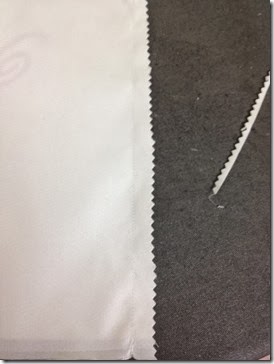
You now have two long pieces of fabric, one which has the embroidery on it and the other is plain. Both are interfaced. At the top of the sash part with the embroidery on it, pin the second piece of the sash. Stitch together with a 5/8” seam. Pink the seam allowance to 1/4 – 3/8”

008

Press the seams open. You can see that the one side is not even. That is fine for now.

009

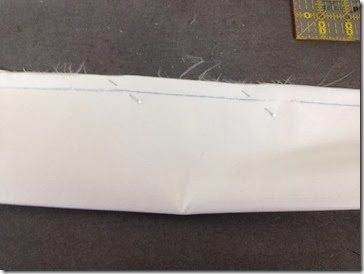
Fold the banner in half making sure the folded edge doesn’t pucker. I found it easiest to start at the shoulder seam and pin down a bit, then start from the bottom up. I took my time until I was happy.

Next I took my 4” square ruler and measured from the folded edge and put a line on using a clover chalk marker.

012

Not certain I like the blue on the white but the yellow is permanent.

015

Where I want an opening for turning, I make marks.

014

Stitch on your line making sure you back stitch at both ends of the opening. I do a long basting stitch in the opening which I will rip out later on. Press the seams at the opening back so you have a line when you go to hand sew.

016

Pink the seam so it won’t show on the right side.

017

Turn right side out.

018

Press the seam to one side using just the tip of your iron. I had the seam in the middle of the banner. Press well with the side seam in place.

I put the banner on the dress form to look at it. The challenge was coming up. The ends needed to be diagonal in my mind. I measured down 44 1/4” from the shoulder seam on the banner and made a dot.

021

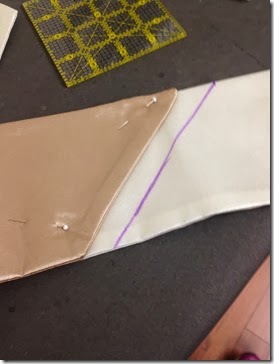
With the 45o line on the fold I measured it so the point was on the fold and the shorter end was on the seam. I marked it.

022

The back was measured down 44 1/4” from the shoulder seam and it was marked the same way.

023

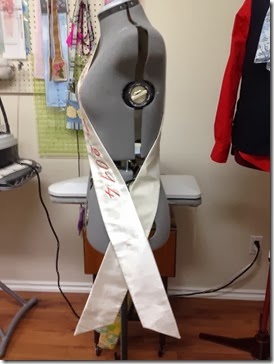
I put it back on the dress form to look at it.

025

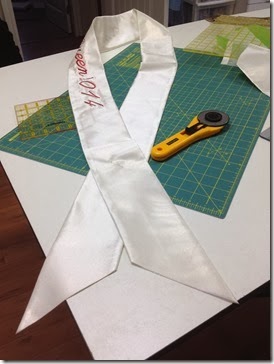
Perfect. I cut the fabric off at the purple lines using the rotary cutter and the ruler.

027

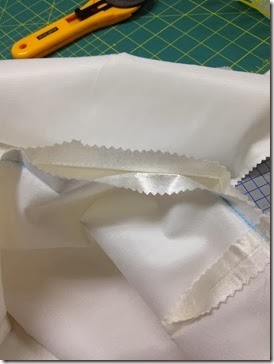
Turn inside out and pin the ends and stitch with a 5/8” seam. Pink the seam back and make sure the points are trimmed so they turn sharply.

028

Clip the basting stitches you put in when you sewed the long edge.

029

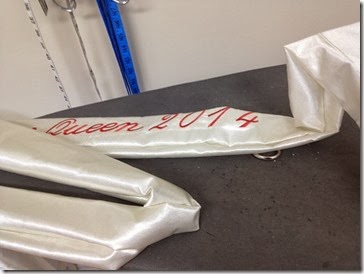
Turn right side out and press carefully. I put it back on the dress form, did a bit of adjusting to make sure the bottom inside edges were even.

030

Hand stitch your opening shut using a ladder stitch. Embellish how ever you want.

031032

I did enjoy doing this sash as it is different than the ones I made before. If you want to do the points at 60o you can do that also.