Sunday, February 23, 2014

How to Get "The Great British Sewing Bee"


Instructions to get The Great British Sewing Bee Season 2”
  1. Download and run Google Chrome. Have it open
  2. Download Hola in Chrome and run. The little Hola flame will be in the top right hand corner. Set up a free account with Hola and verify your email.
  3. Click on that little flame to turn it on and it will bring you to pages you want to unblock. I unblocked BBC (not iplayer). Press Go
  4. Click on Access BBC UK Go
  5. You have reached the BBC home page.    http://www.bbc.co.uk/iplayer/episode/b03w7wjp/The_Great_British_Sewing_Bee_Series_2_Episode_1/
I had some issues with this and when I refreshed the video page, it worked. I realized I wasn’t signed in. I see that when I bring up a new page, the little hola flame is there. When I click on the flame, it gives me the popular sites to unblock (I have a Canadian list). So now I can:
  • Click on Hola at top right hand corner of Chrome
  • Choose BBC to unblock and follow the directions to turn Chrome into a British page (the British flag shows up)
  • Paste in the Url above and watch.
I will be deleting the instructions on Tuesday but will leave the link for future reference.
Until tomorrow……………………….

Wednesday, February 12, 2014

Banner/Sash Tutorial Part 2

Once the sash has the paper pieces pinned onto them, the stitching out can begin.

Hoop a layer of cut away stabilizer and hoop it. I pull mine tight after it is hooped as I was taught that when I first learned to embroider. Then spray the stabilizer with a temporary adhesive.

004

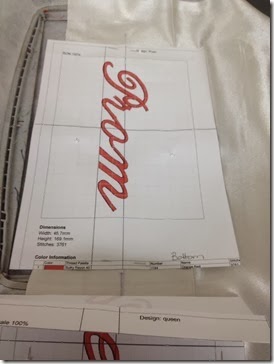
I use this product as I can buy it several times a year at 50% off. Carefully lay your banner onto the hoop so the paper is in the correct place. As my hoop is larger than the template, I have to make sure the template is sitting in the bottom left hand corner and fits along the bottom and side snuggly. I spend some time at this stage making sure all is smooth and the purple line is matching at the center mark (top and bottom) of the hoop.
005

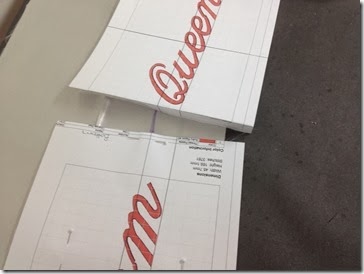
Notice that I have folded the next paper template (Queen) back to keep it out of the way. When you are happy, put it on your machine.

I check to make sure the hoop is the right size. In this case, it shows the hoop size as 180x100 or 5x7”.

006

I change the hoop size to 240x150.

007

I go to the next part where I can stitch out. I have a feature that allows me to make sure the needle is in the center of the design. I do that.

009

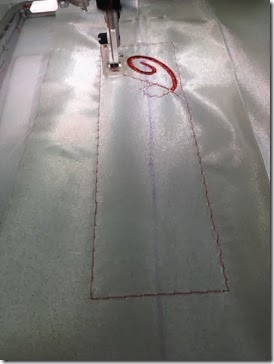
And back to the stitching. I remove the paper template and do a fix stitch and start to stitch the design.
010

When done, I remove the fix stitching and cut away the stabilizer and repeat for Queen and 2014. Each time I set up the hoop, I take my time to make sure the template is in the hoop correctly and the satin is smooth underneath. There is, on occassion, when I have to do a minor fix of the fabric at the machine. I continue stitching until the banner is done.

015

At this stage, I have to finish up the last hooping and it is ready to sew. This satin is light weight and I should have interfaced it with a light weight knit interfacing before doing the stitching.

Next is making the actual banner. That will happen this weekend.

Tuesday, February 11, 2014

Banner/Sash Tutorial–Part One

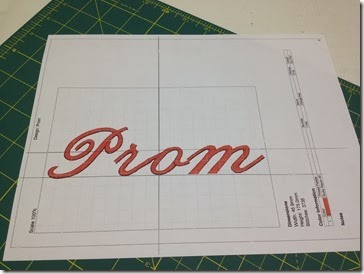
When starting this banner, I used 5D Embroidery Software. It is fairly easy to do the lettering, somewhat harder to get it looking perfect. The choice of lettering makes a difference.

009

After I printed out the words from the software, I drew the center lines longer and then added a line under the words.

010


I hated the way the “o” connected to the “m” so I did a bit of a fix up. You will see it later.
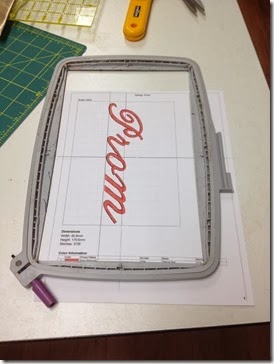
I then laid my hoop over the word and centered it up with the marks on the hoop. This hoop is bigger than 5 x 7” and the words are designed to go into a 5 x 7” hoop. No worries as I can fix that at the machine.


011


I drew around the inside of the hoop. 


012


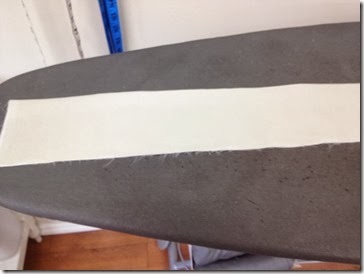
And then cut out on the lines. Once that was done, I took the 9.25” x width of the fabric strip to the ironing board and ironed it in half lengthwise. Before ironing it in half, press on interfacing that is cut 9.25" wide and the length of the fabric. The interfacing I use is 60" wide and is lightweight. The demonstration is not done this way and I do not like it as the fabric is lightweight and light in colour.


013
Open it up flat and you are ready to begin placing your words.
014

Draw a line 2” down from the center fold. Mine is 3” down and I had to erase it and start again. I made a dot and then drew the line further up towards the cut edge.
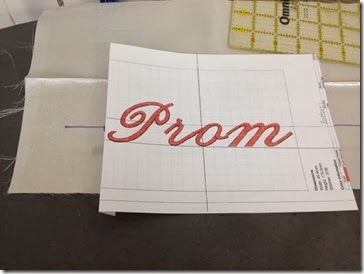
Fold the paper down on the line just left of the P. That is your starting point.

015


Place it on the line you made with the center line on the paper aligned with the line on the sash.


018


The folded edge of the paper is at the purple dot. Center lines are matched to the line and this is ready to pin down. I started at the bottom, then sides, and finally unfolded the top and pinned it down.
I made the words Queen (and King) and 2014. I repeated the steps above in readiness to add them to the banner.
I folded down the line to the left of Queen and then I lined up the words with the line I drew under the letters.


021


And pinned in place. I will flip the folded piece out later. I needed to see how this looked.


022


And a repeat for 2014. Notice the center lines don’t match. The lines under the words match. I fiddled to make sure it was pretty near perfect.


023


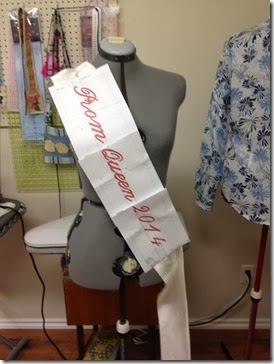
And I pinned it on the dress form so you can see how it looks.


024


Don’t panic, it will look fine. I panicked when I looked at the first banner I did as it looked huge. The paper print out does that to you; messes with your head. The girls love the banners I made them.
The banner designs are uploaded here. I did a PES format.
As this is a sash that goes over the shoulder and is pinned together at the hip, I would try to buy a large crown shaped pin. We have a tiny one that wouldn’t work. Up near the shoulder yes. Down at the hip no.


025


Next, how to stitch them out.
Until tomorrow………………………

Wednesday, January 01, 2014

Explore 2014


This year I plan on using a guiding word rather than have resolutions. In the past, I have used resolutions to guide me throughout the year; they were actually a list of attainable things. I have been able to complete some, others have taken a detour or hit the stop sign. And other projects merged into main stream taking over life. It wasn’t fulfilling; it was too narrow. Do this and that and nothing else.

My guiding word this year is EXPLORE. It fits my personality type perfectly. Exploring allows me the freedom to examine, think, decide, toss, and chose whatever it is I am exploring. It allows me to slow down rather than rush and do it on the fly. I can look at the details which I love to do.

Explore allows me to be inside and outside doing many things I want to do and enjoy doing. I do not want to feel that I need to be meeting deadlines all the time. I want to wake up each morning and choose what I want to do. I spent too many years meeting deadlines and want to move away from that.

Explore doesn’t mean getting into new areas though it did cross my mind. Spinning, weaving, machine knitting all called at me. I had to say whoa. I can’t add to my existing collection.

Explore means getting into what I am doing, try new techniques, take classes on what I am doing, explore the internet for some techniques, and to do what ever it is I am doing to the best of my ability. Until all the fabric is used up, there cannot be anything new. I know that. Explore means getting into what I am doing, trying new techniques, taking classes, explore the internet, and do what ever it is I am doing to the best of my ability. Until all the fabric is used up, there cannot be anything new. I know that. 

I have four areas I am looking at:

Lifestyle:
A big one for us. More hard core than other areas.

We want to be free to travel, read, enjoy our grandson, garden, and do whatever hits our fancy.

Monitor our eating habits and activity level as I am insulin resistant. 

Declutter and purge what we don’t want in our lives. Simply bring in the tubs, go through them, donate or sell and move on. Live in a simplistically styled home.

Sewing:

Explore techniques, patterns, ideas, and what ever else comes my way in the area of garment sewing. 

Three times a week for no more than 3 hours a day.

Use up the stash. Buy only what is needed to finish a project or a collection

Limit sewing for others to one or two items per year.

Crafts:

Sew up the fabric in the craft tubs and decide if the items will be used in our home, be given away, or sold cheaply at craft bazaars. 

Twice a week for no more than 3 hours a day.

Buy only what is needed to complete a project (zippers, thread, pillow forms, batting).

Work through learning how to use 5D Embroidery. Use up thread on hand.

Knitting/Crocheting:

Work through the tub of yarn as best as possible. Socks, sweaters, headbands, hats, mitts, afghans are on the list.

Learn how to use the Bond knitting machine I purchased. If I like it, then look for a another machine.

In Conclusion:

Balance up our lives so we can be free to do as we want when we want. The only given is lifestyle. 

Saturday, December 28, 2013

Home From our Holiday

We arrived home from our holiday at our son’s, daughter-in-law’s and grandson’s home. It was an exciting time.

We traveled over by plane on the busiest day and had three delays in Vancouver. Thank goodness we had business class tickets so spent quite a bit of time in AC’s lounge. We arrived at our destination at 1:13 a.m. and didn’t feel so bad as another carrier’s plane to the same airport at about the same time got delayed until 3:45 a.m.

The whole visit was fun. Six adults and one child in a small house was interesting. We did get outside as the weather was unseasonably warm. But inside we could move from one space to another and sit. We had some good laughs and during our time there, the “kids” put an offer on a house that was accepted. More space to move around in the next time we have Christmas together.

Some pictures of our Christmas.

The Night Before Christmas and

005

I was so excited I couldn’t fall asleep.

Santa got his snack

006

using a special set of dishes.

The stockings were hung

007

and poor St. Nick

008

had to leave presents on the floor too.

Stockings were first

011

and then came the gifts

022

And when all was done

026

Grandpa and I had on our cowboy clothes.

It was a very special first Christmas with our grandson. Hope all of you had a great Christmas too.

Now we are home and the sewing room is calling to be cleaned. The washing of the walls begins today.

Until tomorrow………………………