Wednesday, December 08, 2010
Mug Rugs
Fast forward to 3 years ago. I made 6 Christmas tree napkins, matching placemats and mug rugs. I showed them at "Count Down to Christmas" in Beaverlodge and they were an immediate hit. All you need is some fabric and about an hour to make 4 of these.
Step One
Cut out 5 squares of fabric 5" square. Three are to be in one fabric and 2 in another. Use higher contrast fabrics for best results. My fabrics have the brown in common with one being a suede look and the other cowboy ropes.
Step Two
Lay one of the three squares right side up on your work surface. There will be 4 squares left - two of each fabric.
Step 3
Fold and press the 4 remaining fabrics into triangles wrong sides together. Everything is now ready to assemble.
Step 4
Lay the first triangle onto the square as shown. I used the contrast fabric to show how it lays. Triangle corner to a corner in the square and bias part going diagonally across the base fabric. Pin in place.
Step 5
Lay the second piece of fabric on as follows. I always move clockwise to the next corner. Pin in place moving any pins underneather to the top. I pin the points and the corner.
Step 6
Repeat with contrast colour. Pin in place bringing hidden pins to the top.
Step 7
Put on last triangle. When you lay it on, it will look like this. I pinned it down to make sure all the points were in place. I rotated my item 1/4 turn.
Remove the pins from the left hand side of the first triangle. Lift that end up and place it over top of the 4th fabric like so:
It should now look like this
Step 8
Stitch 1/4" around the outside edge. When I come to each corner, I make sure the needle is down between the two points before I turn the fabric.
Step 9
Cut the corners on the diagonal
Step 10
Turn your mug rug right side out through the the center X of the triangles. Using a pointer, push out the corners
Step 11
Crisp up your sewn edges (I roll to do this) and press well.
And it is ready to use.
I hope this helps you making your own mug rugs. I know I turn my fabric to work on it easily so you may have to turn yours also to line it up to look like mine.
Sunday, December 05, 2010
Christmas Tree Napkins
My memory was jarred when a person showed her gorgeous Christmas tree napkins. Here is where you can see them:
http://imadethis-asewingblog.blogspot.com/2010/12/christmas-tree-napkin-this-is-very.html
The instructions can be obtained here:
http://lynbrown.com/?p=512
I thought where are mine (they have been moved around a couple of times) and I dug them out. I had made 6 napkins, 6 placemats, and 6 mug rugs. And they have never been used. I saw the pattern at Around the Block and the owners challenged me to make some for the Count Down to Christmas sewing day (12 hours long). I did and made the placemats and mug rugs.
Here are some pictures:
The complete set of 6.
The napkins.
The mug rugs.
I ended up doing a demonstration of the mug rugs at Count Down to Christmas and by the time Christmas arrived, Around the Block had sold most of its fat quarters. There were literally hundreds of mug rugs given as gifts that year.
One napkin folded into threes. Love this way much better.
Here is a video on another way to make Christmas Tree Napkins. Cute idea.
Sunday, October 31, 2010
And The Grande Finale from Ron Collins
The last technique Ron had for us that I could picture at the workshop was yokes. The process is very similar to the pocket process but here are a few ideas that I do and Ron approved of.
1. Sew the front and the back together wrong sides together at the should seams. Do not finish these seams. Press open as shown.
2. Cut a piece of Trace A Pattern so it goes up the body 3" from the highest part of the yoke. Stitch in place with 3/8" or 5/8" seam allowance. Notch where necessary and trim to 1/8".
3. Add Steam A Seam next to the bottom edge. Stitch shoulder seams together with right sides together. Press seams open.
4. Place on shirt matching the seam allowances. The seam allowances on the yoke will cover the seam allowances on the shirt. Pin in place matching up the seam allowances, front edges, etc. Pin in place. Lift up the edge of the yokes and remove the paper covering from the Steam A Seam. Press the yoke in place and it is ready to top stitch.
More Tips From Ron Collins
Ron showed us how to make perfect pockets that are rounded at the bottom. They look great on campshirts and some blouses but not on western shirts.
What you need:
Curved pocket template - 3 mm side of this template only
Steam a Seam 1/4" in width
What to do:
1. Cut pocket wider and longer than pocket pattern. Serge the top edge to finish and press ad shown.
2.Cut a piece of trace a pattern to fit the piece of fabric as shown. Draw on the straight lines with a pencil and use the pocket template to round the corners.
3. Stitch around the pocket on the drawn line. Trim seam allowance to 1/8" clipping the curves.
4. Iron on Steam A Seam close to the edge. Remove paper off the fusible strip.
5. Iron pocket on to shirt and top stitch down. Look carefully at how Ron did the stitching at the top of the pocket. Use edging foot on your sewing machine to get close to the edge of the pocket.
Sunday, October 03, 2010
Ron Collins Workshop Continued
Top stitching on the collar:
This method takes a bit longer to do but it looks perfect on some of our shirts.
The other technique I worked on was new sleeve plackets. I have been doing continious laps. They have their place on shirts and blouses but I wanted to do those plackets you can find on ready to wear. I have spent a lot of time thinking about this technique and my favourite tutorial is this one:
http://www.timms.ca/kft/sew/sleevePlacket.html
It has a free template; the main reason I bookmarked it.
Ron Collins also loves this sleeve placket and we did a sample on Sunday. It is tailored and looks great on men's and some women's shirts. Though you can use the template from Kathleen Timm's page, we used an OPP Sandra Betzina pattern. And some of the steps are slightly different.
1. Cut out your placket pattern and mark it as shown below. Do not interface this piece as sometimes recommended.
You can see that there are a lot of lines on the pattern piece (very confusing) and how few we marked on the fabric piece. Two lines and the dot off by itself.
To get the dots, Ron pokes two or three holes in the pattern piece lays it on the fabric and uses his marking pen to allow the ink to flow through the holes onto the fabric. He clipped the bottom lines, turned them up so you can mark the bottom with two lines. Attach these dots to make a line using a ruler and pen.
Turn under 3/8" on the two sides and the top piece as shown. Press well with steam.
2. Place on the sleeve pattern with the right side of the placket to the wrong side of the shirt. The short side of the sleeve placket faces the back of the shirt and the long side to the front. Or as Kathleen says "the shorter side of the placket should be closest to the underarm edge".
3. Using a shorter stitch length, sew the placket to the sleeve by stitching on the stitching line, stopping and pivoting exactly on the dots.
3. Cut up the center of the stitching to 1/2" from the top angling into the corners. Cut right into the corners but do not cut the stitching.
4. Press the piece so the seam allowances are pressed towards the sleeve fabric so you can turn the placket to the right side. When you are happy with how it looks, give it a good press with steam.
5. Fold the short side over to cover the seam allowance and stitch close to the edge using a slightly longer stitch and the edge stitch foot.
Fold the longer side over and stitch it down going all the way up, around, and part way down the other side and across making a rectangular box.
The almost finished results:
Friday, October 01, 2010
Ron Collins Workshop
While at the Snip and Stitch last weekend, I learned several new techniques. The first one I am going to talk about is top stitching. I do top stitching using my 1/4" foot and Ron showed me how to use a couple of feet that I bought last winter and used for quilting. They are now deligated to my garment sewing drawer.
The two presser feet I now use for top stitching are the edging foot and the edge joining foot.
Edging Foot
Edge Joining Foot
When I am making western shirts, I do a lot of top stitching and usually only do one row of top stitching. This new technique lets me do two rows. Yes I need two presser feet but when it looks professionally done, changing those presser feet are worth it.
With the piece I am ready to top stitch, I do the following:
1. Set the stitch length to 3.5 on my Husqvarna SE or Diamond
2. Attach the Edge Joining foot
3. Set the needle to the far left and then move it right to 2.0
4. Put the edge of the fabric up against the flange and sew slowly keeping the fabric against the flange.
5. Attach the edging foot
6. Set the needle to center, stitch length at 3.5. and needle to the right to 2.0.
7. Place the edge of the fabric up against the flange and sew slowly keeping the fabric against the flange.
Finished sample:
Here is a picture of the classroom we worked in last weekend. Cozy to say the least but we all survived.
Saturday, August 21, 2010
Meshworks For Fabrics and Other Thoughts
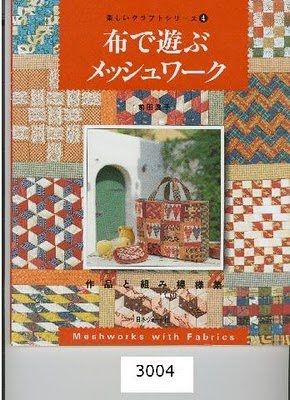
Lynn.pickles asked where I got my meshworks books from. I have been very fortunate to have found mine on Ebay - brand new books. I got them from a lady named Esra Coskun. Her email address is eccoskun@gmail.com. If you email her about getting the books for you, please mention my name. I have bought 2 of each of those books; one set for myself and one set for a friend.
This summer has been very busy with me moving home July 6 in preparation of retiring. We were home 10 days and we headed out to a wedding. This was the first wedding we have been to in our culture in the past 12 years. We have attended a lot of Hutterite weddings in the past 5 years and their weddings are so different to ours. I have done a lot of canning this summer and have put up over 100 jars of fruit, veggies, and jam to date. I have that much left to do before Thanksgiving. We are so happy to have fruit trees and a garden as we had nothing when living in northern BC. We gorged on tomatoes and cucumbers for 3 weeks after I came home.
I keep thinking about what I want to do for the next several months as I need to set new goals. I just finished my summer goals:
- Loose weight -- well I lost 4 lbs over the summer but I haven't lost all the stress weight -- another story.
- Sew 12 western shirts for sale. - I did 13 and sold 7 of them. I also fixed a couple of ladies' shirts that have been hanging around in the Scared Closet. A Lot of Sewing
- Sew a top for myself - well I did but my heavy upper arms don't fit into this top. It hangs in the closet until I slim up those arms.
- Clean up the sewing room - Got that done tonight. I still have 2 Rubbermaid tubs in the room but they will be out of there soon.
My new goals are developing and here they are to date (they begin on Sept. 1):
- make 2 dress for Miss Williams Lake Stampede to wear to Miss Rodeo Canada. You will see more.
- start knitting in the evenings - a scarf to begin with and then socks.
- do meshworks with fabrics - finish a bag (black and raspberry) and start a new one.
- work on my embroidery class (SOS) through Husqvarna.
- make 5 western shirts for ladies and 2 or 3 for children. Do at least one of each in the "new" vintage look.
- and loose weight and clean up the exercise room.
Hopefully that will keep me busy until Christmas. I should sneak in a shirt for the Spousal Unit for his Christmas present. He would be delighted. He helps me so much that I should give him a nice shirt to wear where the sleeves are long enough to come to his wrists and the cuffs can be snapped shut.